If you own a 2014 Chevy Silverado, chances are you’ll eventually need to change a headlight bulb. Whether one goes out unexpectedly or it’s simply time for a replacement, knowing how to change a headlight bulb on your own can save you time and money. This step-by-step guide will walk you through the process of changing a headlight bulb on your 2014 Chevy Silverado.
Tools You Will Need

Before you begin, make sure you have all the necessary tools for the job:
- New headlight bulb
- Screwdriver
- Clean cloth
- Latex gloves (optional)
- Tape (optional)
Now that you have everything you need, let’s get started!
Removing the Old Headlight Bulb

Step 1: Locate the Headlight Assembly
The first step in changing a headlight bulb is locating the headlight assembly. On a 2014 Chevy Silverado, the headlight assembly is located towards the front of the vehicle on either side of the grille.
Step 2: Remove the Headlamp Retainer
Using a screwdriver, remove the headlamp retainer by turning it counterclockwise until it releases. Place the retainer in a safe spot where it won’t get lost.
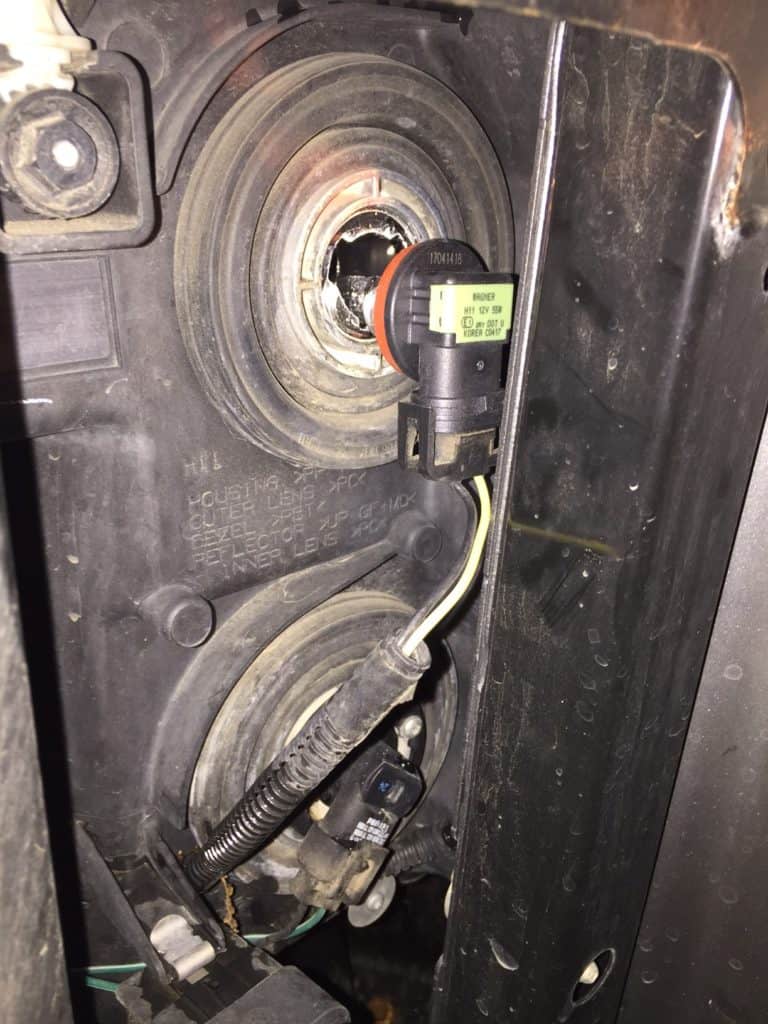
Step 3: Disconnect the Wiring Harness
Once the retainer is removed, gently pull the wiring harness away from the back of the headlight assembly. Be careful not to pull too hard, as you don’t want to damage the wires.
Replacing the Headlight Bulb
Step 1: Remove the Old Bulb
Now that the wiring harness is disconnected, you can remove the old headlight bulb. Simply grab the base of the bulb and twist it counterclockwise to release it from the headlight assembly.
Step 2: Prepare the New Bulb
Before installing the new bulb, it’s a good idea to wear latex gloves or use a clean cloth. This will prevent any oils from your hands from getting onto the new bulb and potentially causing damage. If you don’t have gloves or a cloth, you can also use tape to handle the bulb.
Step 3: Install the New Bulb
Insert the new bulb into the empty slot in the headlight assembly and twist it clockwise until it is securely in place.
Reassembling the Headlight Assembly

Step 1: Reconnect the Wiring Harness
Gently push the wiring harness back into place on the back of the headlight assembly.
Step 2: Secure the Headlamp Retainer
Using the screwdriver, turn the headlamp retainer clockwise until it is securely in place.
Step 3: Test the Headlight
Before putting everything back together, it’s important to test the headlight to make sure it’s working properly. Turn on your headlights and check that the new bulb is functioning correctly.
FAQs

How do I know if my headlight bulb needs to be replaced?
You may notice a decrease in brightness or a yellowing of the light from your headlight. You may also receive a notification on your dashboard indicating a faulty headlight.
Can I change the headlight bulb without any tools?
No, you will need a screwdriver to remove the headlamp retainer.
How often should I change my headlight bulbs?
Headlight bulbs typically last around 500-1000 hours, but it’s best to consult your vehicle’s manual for specific recommendations.
Can I replace just one headlight bulb, or do I need to replace both at the same time?
It is recommended to replace both headlight bulbs at the same time to ensure equal and consistent lighting.
Are there any safety precautions I should take when changing a headlight bulb?
It’s always a good idea to wear latex gloves or use a clean cloth when handling the new bulb to prevent any oils from your hands from damaging it. Also, make sure to turn off your vehicle’s engine and headlights before beginning the replacement process.
Conclusion
Changing a headlight bulb on your 2014 Chevy Silverado is a relatively simple and straightforward task. With the right tools and a little know-how, you can easily replace a headlight bulb on your own. By following the steps outlined in this guide, you can save time and money by doing it yourself rather than taking it to a mechanic. Just remember to always double check your work and test the headlights before hitting the road.